How to add Event Calendar to your Shopify Page
A guide on how to use The Shop Calendar to add a calendar to a specific page on your Shopify store.
Video Tutorial
Step by Step
1. Select the page you would like to host the calendar on
In your Shopify store, you have more than likely created several pages within your website. We usually recommend creating a new page titled "Events" or "Calendar". Shopify will give you the URL: https://{{mystore}}.com/pages/calendar.
However, the calendar can be hosted anywhere on your website. That even means your homepage.
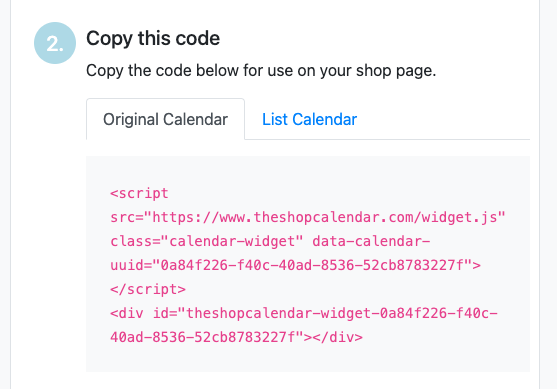
2. Copy the install code
Head to the install page on within The Shop Calendar. On this page you can select from the calendar or list design. Copy the code for the calendar you would like to install. Make sure you grab the entire area code.
3. Paste the code into the page
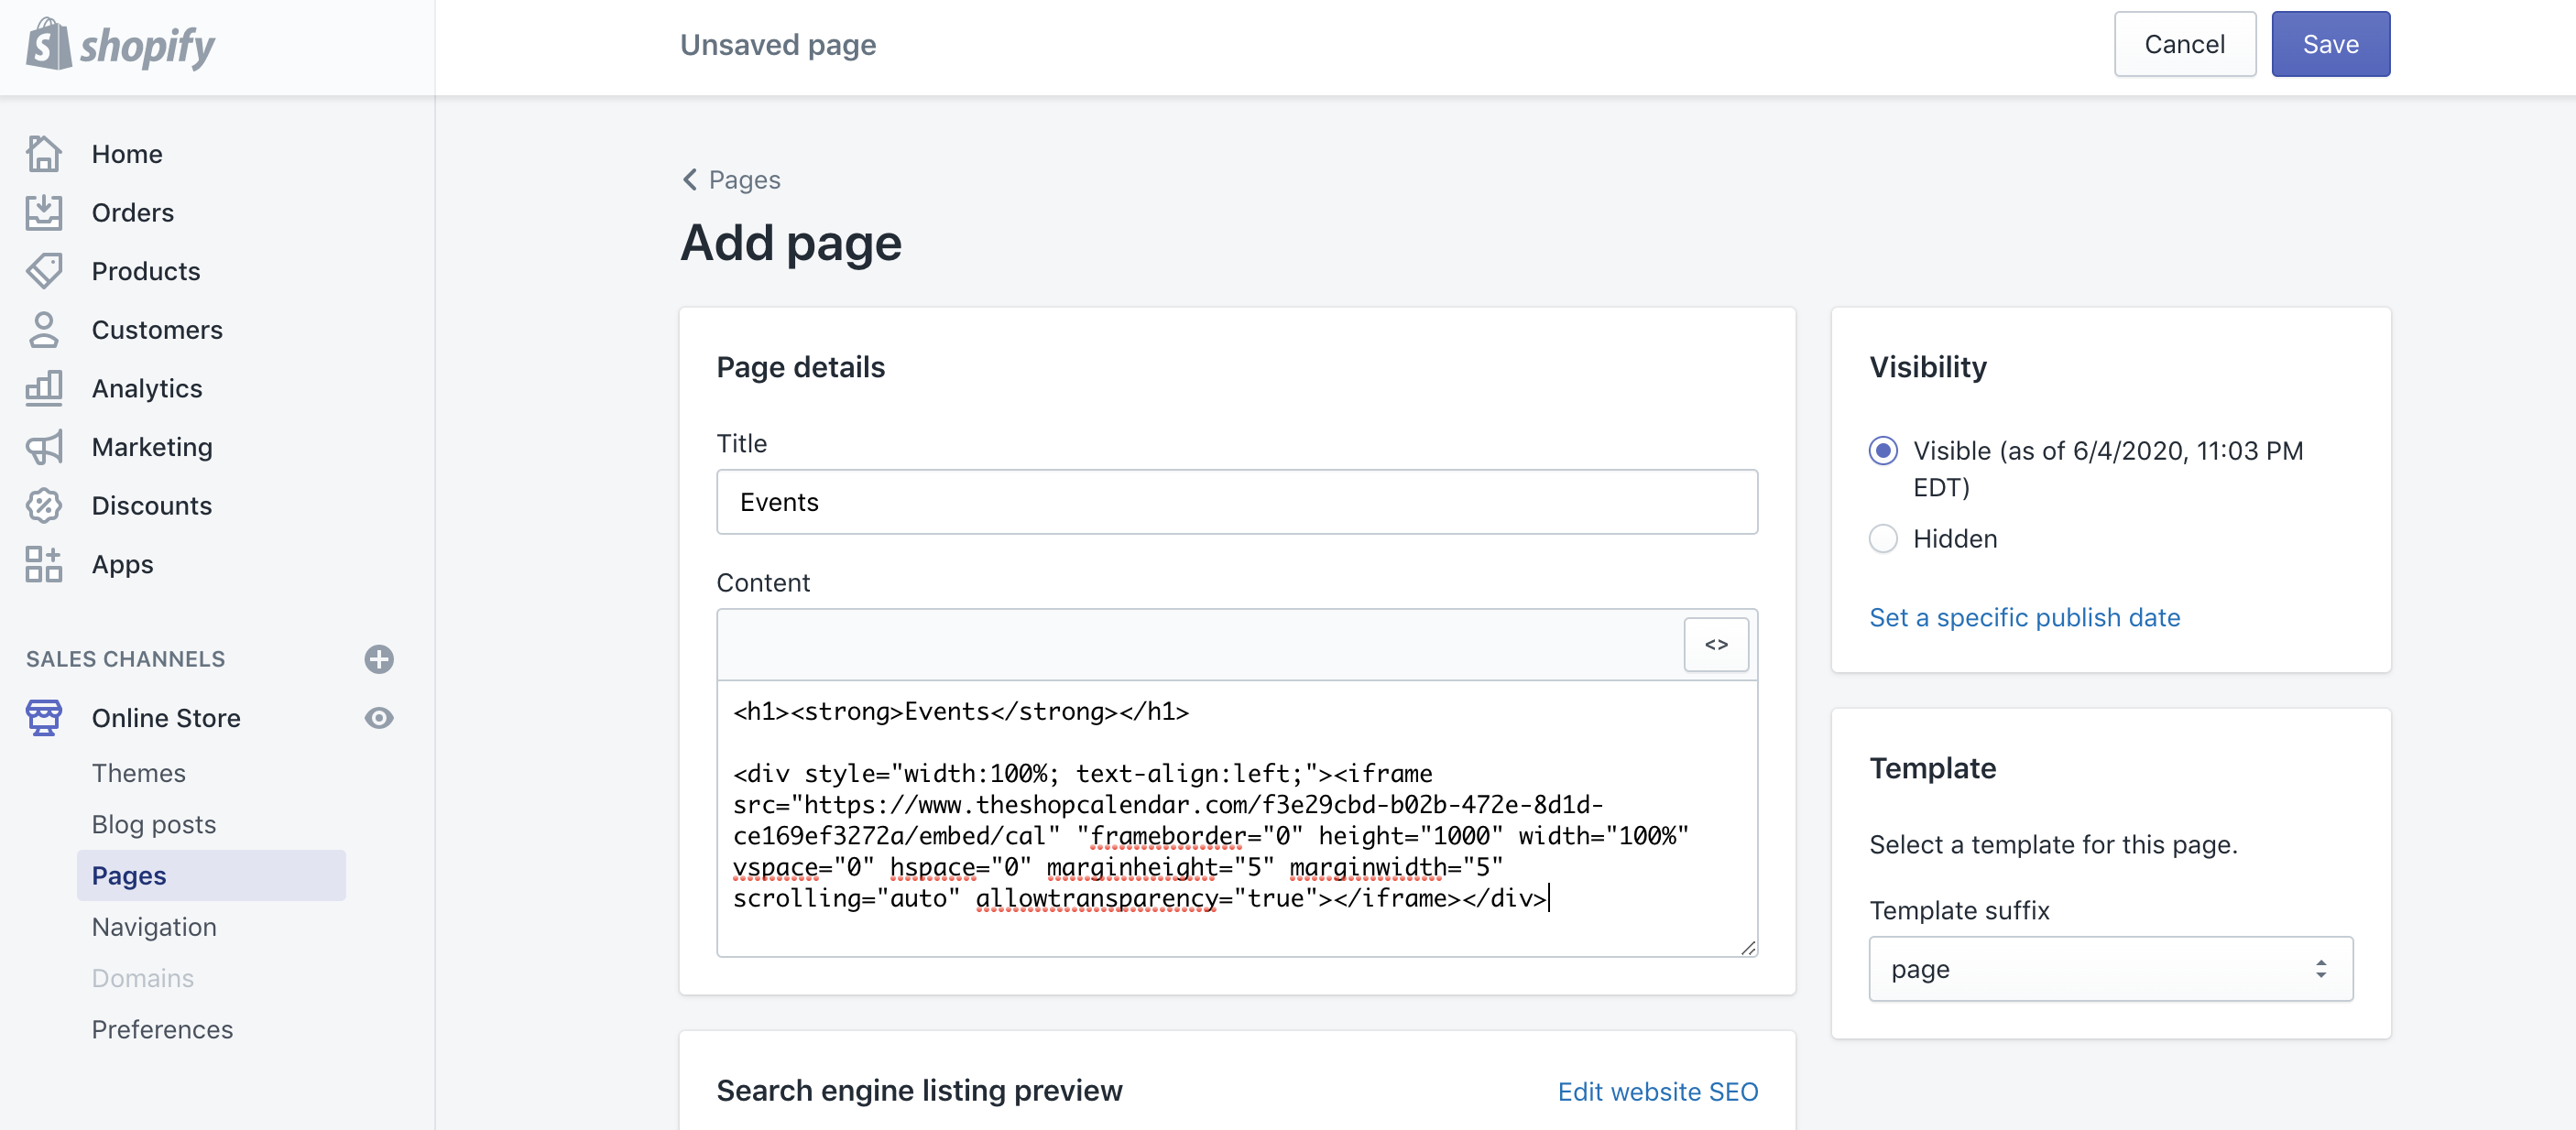
Now that you have the code copied, head back to the page that you want to install the calendar on. Using the HTML editor mode, paste the script into the content area. You can now save the page.
4. Ta-Da! All done
The calendar is now installed on the page. You can now start adding events in and will never have to touch the calendar script again. It's as easy as that!